Difference between revisions of "RyonaRPG/Traps"
(moonspeak reduction) |
m |
||
| (4 intermediate revisions by 2 users not shown) | |||
| Line 1: | Line 1: | ||
{{RyonaRPG}} | {{RyonaRPG}} | ||
| − | + | '''Traps''' range from hidden floor triggers to visible machinery, capture devices and scripted encounters. Some use the game's shared trap-evasion check; others have their own rules. A character who reliably avoids ordinary floor traps can still be caught by a Bear Trap, struck by a moving saw or pulled into a scripted capture. | |
| − | + | __TOC__ | |
| − | === | + | == Quick survival guide == |
| − | |||
| − | |||
| − | |||
| − | |||
| − | |||
| − | === | + | * Use the '''Vigilance''' stance or enable the learned '''Alert''' ability before entering a trap-heavy area. |
| − | + | * '''Float''', '''Levitation''' and '''Flight''' bypass many floor-based traps, but not every trap in the game. | |
| − | + | * '''Thieves' Eye''' disables supported random traps while the character is not attacking or charging. | |
| − | + | * Status resistance still matters. A trap may fail to deal much damage but leave the character Poisoned, Bleeding, Paralyzed, Silenced or Captured. | |
| − | + | * Carry a '''Remedy''', '''Panacea''', '''Teleport Stone''' and any area-specific supplies you expect to need. | |
| + | * Save before interacting with conspicuous beds, restraints, eggs or machinery. Some are encounters rather than ordinary damage traps. | ||
| + | * The '''Invincible''' support effect does not prevent trap damage. | ||
| + | |||
| + | == How trap protection works == | ||
| + | |||
| + | There is no single immunity that covers every object called a trap. The current game uses several overlapping systems. | ||
| + | |||
| + | {| class="wikitable" | ||
| + | ! System | ||
| + | ! What it protects against | ||
| + | ! Important limits | ||
| + | |- | ||
| + | | '''Shared trap evasion''' | ||
| + | | Most hidden random traps and several named floor triggers | ||
| + | | Does not automatically apply to visible machinery, Bear Traps, Demon Flower's Fragrance or scripted captures. | ||
| + | |- | ||
| + | | '''Float-compatible avoidance''' | ||
| + | | Many arrows, blades, spikes, shocks and other floor-level triggers | ||
| + | | Each trap decides whether Float works. It is not universal immunity. | ||
| + | |- | ||
| + | | '''Status resistance''' | ||
| + | | The ailment applied after a trap hits | ||
| + | | May prevent or shorten the ailment without preventing damage or the trap animation. | ||
| + | |- | ||
| + | | '''Capture resistance''' | ||
| + | | Restraint and capture checks that support it | ||
| + | | Scripted captures and special endings may use their own conditions. | ||
| + | |- | ||
| + | | '''Equipment-specific protection''' | ||
| + | | The exact routines named by the item or event | ||
| + | | Do not assume that protection against ordinary traps covers every set piece. | ||
| + | |} | ||
| + | |||
| + | === Shared trap evasion === | ||
| + | |||
| + | When a trap uses the shared check, the game combines the applicable character, stance, ability, magic and equipment effects. A successful check cancels the trap before its main effect. The following are the most useful sources. | ||
| + | |||
| + | {| class="wikitable sortable" | ||
| + | ! Method | ||
| + | ! Effect | ||
| + | ! Notes | ||
| + | |- | ||
| + | | '''Vigilance''' stance | ||
| + | | Trap resistance +30%; capture resistance +50% | ||
| + | | Attack, Defense, Magic and Spirit are reduced by 20% while the stance is active. | ||
| + | |- | ||
| + | | '''Alert''' ability | ||
| + | | 25%, 50% or 75% trap-evasion chance at levels 1–3 | ||
| + | | Learned in the '''Ability Space''' and enabled from '''Special Menu -> Abilities'''. Some older in-game explanations call this ability Vigilance. | ||
| + | |- | ||
| + | | '''Thieves' Eye''' | ||
| + | | Disables supported random traps | ||
| + | | A support spell found through [[RyonaRPG/Locations/Dokuno Falls and Dokuno Marsh|Dokuno Falls and Dokuno Marsh]]. It is inactive while attacking or charging. | ||
| + | |- | ||
| + | | '''Float''', '''Levitation''' or '''Flight''' | ||
| + | | Automatically bypasses compatible traps | ||
| + | | Particularly useful against floor triggers. Bear Traps and some scripted hazards ignore it. | ||
| + | |- | ||
| + | | '''Karakroid Shield''' | ||
| + | | Prevents supported traps from triggering | ||
| + | | It also has an explicit exemption from Demon Flower's Fragrance. This still does not guarantee immunity to every moving or scripted hazard. | ||
| + | |- | ||
| + | | '''10-Foot Pole''' | ||
| + | | Excellent trap avoidance | ||
| + | | The weapon is deliberately slow. | ||
| + | |- | ||
| + | | '''Kunoichi Mail''' | ||
| + | | Improves capture and trap resistance | ||
| + | | The item description does not display a numerical rate. | ||
| + | |- | ||
| + | | '''Dance Robe [Ame-no-Uzume]''' | ||
| + | | Trap evasion +25% | ||
| + | | Requires current Charm of 60 or higher. See [[RyonaRPG/Charm|Charm]]. | ||
| + | |- | ||
| + | | '''Warrior''' type | ||
| + | | Trap evasion +10% | ||
| + | | A passive class-type bonus. | ||
| + | |- | ||
| + | | '''Fate Spin''' | ||
| + | | Forces supported random checks toward their best result | ||
| + | | Helps with the shared routine, but does not make a non-random scripted hazard evadable. | ||
| + | |} | ||
| + | |||
| + | The '''No Resistance''' stance disables evasion abilities. A character using it should expect supported traps to connect even if Alert or another evasion effect is enabled. | ||
| + | |||
| + | Several characters also have innate protection. Examples include Ultima, Carmilla and Lilith's Float or Levitation, Yuffie's trap-evasion bonus, Fairy's Flight and Cherie's Hawk Knight avoidance. See [[RyonaRPG/Characters|Characters]] for the exact character mechanics. | ||
| + | |||
| + | == Hidden random traps == | ||
| + | |||
| + | Hidden random traps select their effect when triggered. The trap's name is shown near the upper-right corner of the play area. The ordinary and strong pools have different contents. | ||
| + | |||
| + | === Standard random trap === | ||
| + | |||
| + | {| class="wikitable sortable" | ||
| + | ! Result | ||
| + | ! Chance | ||
| + | ! Typical effect | ||
| + | |- | ||
| + | | Poison Arrow || 20% || Damage and Poison | ||
| + | |- | ||
| + | | Invisible Blade || 20% || Physical damage, often with Bleeding | ||
| + | |- | ||
| + | | Electric Shock || 20% || Lightning damage and Paralysis | ||
| + | |- | ||
| + | | Demon Flower's Fragrance || 20% || An arousal-related effect checked through its own routine | ||
| + | |- | ||
| + | | Seal || 10% || Silence or magic restriction | ||
| + | |- | ||
| + | | Darkness Trap || 10% || Blindness | ||
| + | |} | ||
| + | |||
| + | The shared random-trap routine is used most heavily in [[RyonaRPG/Locations/Demon Castle Gaddem|Demon Castle Gaddem]], with smaller groups in several other late-game and trap-focused areas. | ||
| + | |||
| + | '''Demon Flower's Fragrance is the exception inside this pool.''' Generic trap evasion and Float do not avoid it. Status resistance remains useful, while the Bio-Rubber Suit and Karakroid Shield have explicit protection in its event. | ||
| + | |||
| + | === Strong random trap === | ||
| + | |||
| + | The stronger pool appears chiefly in late-game areas such as Demon Castle Gaddem and [[RyonaRPG/Locations/Floating Continent Laputa|Floating Continent Laputa]]. Every result selected by this pool uses the shared evasion check. | ||
| + | |||
| + | {| class="wikitable sortable" | ||
| + | ! Result | ||
| + | ! Chance | ||
| + | ! Typical effect | ||
| + | |- | ||
| + | | Flame Pillar || 25% || Heavy fire damage | ||
| + | |- | ||
| + | | Poison Arrow || 12.5% || Damage and Poison | ||
| + | |- | ||
| + | | Invisible Blade || 12.5% || Physical damage, often with Bleeding | ||
| + | |- | ||
| + | | Electric Shock || 12.5% || Lightning damage and Paralysis | ||
| + | |- | ||
| + | | Handcuffs || 12.5% || May force Slave Princess's Handcuffs onto the character | ||
| + | |- | ||
| + | | Ether Eater || 9.375% || Consumes Ether from the inventory | ||
| + | |- | ||
| + | | Magic Seal || 9.375% || May force a Magic-Sealing Collar onto the character | ||
| + | |- | ||
| + | | Seal || 6.25% || Silence or magic restriction | ||
| + | |} | ||
| + | |||
| + | == Common named traps == | ||
| + | |||
| + | The table summarizes recurring trap routines rather than every individual tile. Placement and exact damage can vary by map. | ||
| + | |||
| + | {| class="wikitable sortable" | ||
| + | ! Trap | ||
| + | ! Main effect | ||
| + | ! Shared evasion? | ||
| + | ! Notes and common areas | ||
| + | |- | ||
| + | | '''Poison Arrow''' | ||
| + | | Damage and Poison | ||
| + | | Yes | ||
| + | | Float-compatible. Common in the [[RyonaRPG/Locations/Dwarven Great Tunnel|Dwarven Great Tunnel]], [[RyonaRPG/Locations/Villains' Valley|Villains' Valley]], Mountain Cave and [[RyonaRPG/Locations/Suspicious Temple|Suspicious Temple]]. | ||
| + | |- | ||
| + | | '''Darkness Trap''' | ||
| + | | Blindness | ||
| + | | Yes | ||
| + | | Float-compatible. Used in the Dwarven Great Tunnel, [[RyonaRPG/Locations/Forgotten Mansion|Forgotten Mansion]], Ancient Library and Suspicious Temple. | ||
| + | |- | ||
| + | | '''Invisible Blade''' | ||
| + | | Damage and Bleeding | ||
| + | | Yes | ||
| + | | Float-compatible. Mage Armor reduces its damage. Common in the Forgotten Mansion, Suspicious Temple, [[RyonaRPG/Locations/Undersea Temple|Undersea Temple]] and Demon King's Palace. | ||
| + | |- | ||
| + | | '''Spike Floor''' | ||
| + | | Physical damage | ||
| + | | Yes | ||
| + | | Float-compatible. Used in the Forgotten Mansion, Pyramid, Dwarven Great Tunnel and Suspicious Temple. | ||
| + | |- | ||
| + | | '''Electric Shock''' | ||
| + | | Lightning damage and Paralysis | ||
| + | | Yes | ||
| + | | Float-compatible. Found in Floating Continent Laputa, [[RyonaRPG/Locations/The Astral|The Astral]], [[RyonaRPG/Locations/Lionel Ideology Church|Lionel Ideology Church]] and Suspicious Temple. | ||
| + | |- | ||
| + | | '''Seal''' | ||
| + | | Silence or magic restriction | ||
| + | | Yes | ||
| + | | Float does not automatically cancel this trap. Found in the Dwarven Great Tunnel, [[RyonaRPG/Locations/Mullonde Necromancy Hall|Mullonde Necromancy Hall]], Villains' Valley and Suspicious Temple. | ||
| + | |- | ||
| + | | '''Freezing Gas''' | ||
| + | | Ice damage and Freeze | ||
| + | | Yes | ||
| + | | Float-compatible where the shared trigger is used. | ||
| + | |- | ||
| + | | '''Flame Pillar''' | ||
| + | | Heavy fire damage | ||
| + | | Yes | ||
| + | | Used prominently in Suspicious Temple and Floating Continent Laputa. | ||
| + | |- | ||
| + | | '''Ether Eater''' | ||
| + | | Removes 1–3 Ether | ||
| + | | Yes | ||
| + | | The inventory loss occurs only if the trap connects. | ||
| + | |- | ||
| + | | '''Curse Ring''' | ||
| + | | Forces one of several cursed rings onto the character | ||
| + | | Yes | ||
| + | | Removal follows the cursed-equipment rules. See [[RyonaRPG/Curse Level|Curse Level]]. | ||
| + | |- | ||
| + | | '''Handcuffs''' | ||
| + | | May force Slave Princess's Handcuffs | ||
| + | | Yes | ||
| + | | A restraint trap in the strong random pool and some individual placements. | ||
| + | |- | ||
| + | | '''Magic Seal''' | ||
| + | | May force a Magic-Sealing Collar | ||
| + | | Yes | ||
| + | | Separate from the ordinary Seal result. | ||
| + | |- | ||
| + | | '''Tentacle Stripping''' | ||
| + | | Removes equipment | ||
| + | | Yes | ||
| + | | Bio-Rubber Suit and Tentacler Z are explicitly protected from this routine. | ||
| + | |- | ||
| + | | '''Flesh Rope''' | ||
| + | | Forces Flesh Rope equipment | ||
| + | | Yes | ||
| + | | The forced equipment has its own removal rules. | ||
| + | |- | ||
| + | | '''Cordlike Parasite''' | ||
| + | | Forces Cordlike Parasite equipment | ||
| + | | Yes | ||
| + | | The internal trap routine is also used by bondage-themed triggers. See [[RyonaRPG/Parasites|Parasites]]. | ||
| + | |- | ||
| + | | '''Sticky Mucus''' | ||
| + | | Inflicts Slime-Coated | ||
| + | | Yes | ||
| + | | Bio-Rubber Suit and Tentacler Z are explicitly protected. | ||
| + | |- | ||
| + | | '''Trip Stone''' | ||
| + | | Knocks the character down or interrupts movement | ||
| + | | Yes | ||
| + | | Float-compatible. Used on the Ayakashi Mountain Path. | ||
| + | |- | ||
| + | | '''Alarm Device''' | ||
| + | | Activates an area-specific alarm response | ||
| + | | Yes | ||
| + | | The consequence is controlled by the surrounding map event. | ||
| + | |- | ||
| + | | '''Meteor''' | ||
| + | | Heavy scripted damage | ||
| + | | Yes | ||
| + | | Used in The Astral. | ||
| + | |} | ||
| + | |||
| + | == Fixed and moving hazards == | ||
| + | |||
| + | These traps usually have visible map objects, movement patterns or their own event logic. Their behavior cannot be inferred from the shared random-trap rules. | ||
=== Spinning Saw === | === Spinning Saw === | ||
| − | + | ||
| − | + | Moving saws deal damage, can cause Bleeding and may knock the character away. They are especially associated with the Undersea Temple and [[RyonaRPG/Locations/Execution Tower|Execution Tower]]. Watch a full movement cycle before crossing a narrow lane. | |
| − | |||
| − | |||
| − | |||
=== Sparking Rod === | === Sparking Rod === | ||
| − | |||
| − | |||
| − | |||
| − | |||
| − | |||
| − | === | + | Electrical rods deal damage and can inflict Paralysis, Bleeding or Fallen depending on the version and area. Some variants are Float-compatible; do not assume that every sparking obstacle uses the same event. |
| − | + | ||
| − | + | === Swinging axes, lances and falling objects === | |
| − | + | ||
| − | + | Swinging axes, giant lances, logs, boulders, meteors and iron balls use map-specific timing. Some deal a fixed amount, while others scale from maximum HP. The [[RyonaRPG/Locations/Lomei Labyrinth|Lomei Labyrinth]] is particularly dense with visible spears, cutters, arrows, lava and rolling discs. Demon King's Palace uses several heavy falling-object traps, while the Ayakashi Mountain Path uses trip stones and logs. | |
| − | |||
| − | === | + | === Bear Trap === |
| − | + | ||
| − | + | Bear Traps are hidden restraints used most prominently in Villains' Valley. They do '''not''' use the generic trap-evasion check, and Float does not protect against them. Status resistance can still help. If the character is Captured, press the attack key repeatedly to escape unless the surrounding event gives different instructions. | |
| − | + | ||
| − | + | === Spider Web === | |
| − | + | Spider Webs restrain the character and are common in [[RyonaRPG/Locations/Norsley Sea of Decay|Norsley Sea of Decay]] and the [[RyonaRPG/Locations/Poison-Insect Labyrinth|Poison-Insect Labyrinth]]. The exact follow-up depends on the nearby enemies or event. | |
| − | |||
| − | == | + | === Giant Insect's Mouth === |
| − | + | Some insect areas disguise a capture or damaging trigger as part of the terrain. These use their own routine rather than the standard random-trap pool. Treat suspicious organic openings as encounters, not safe scenery. | |
| − | |||
| − | |||
| − | |||
| − | === | + | === Writhing Cave floor traps === |
| − | |||
| − | |||
| − | |||
| − | |||
| − | + | The [[RyonaRPG/Locations/Writhing Cave|Writhing Cave]] contains faintly glowing floor triggers, tentacles, organic spikes and capture hazards. Vigilance can evade supported floor traps, but the cave also contains enemies and scripted contacts that use separate checks. | |
| − | |||
| − | |||
| − | |||
| − | === | + | === Tentacle Bed === |
| − | |||
| − | |||
| − | |||
| − | + | Tentacle Beds appear in places including the Poison-Insect Labyrinth, Norsley Sea of Decay and scripted torture areas. They are capture events rather than ordinary damage tiles. The character may be restrained, drained and stripped of items or equipment. Failing or refusing to escape can advance a special route, including the persistent Kodoku Broodbed outcome described under [[RyonaRPG/H Events and Endings|H Events and Endings]]. Save before interacting if you do not want to enter that route. | |
| − | |||
| − | |||
| − | |||
| − | === | + | == Treasure and scripted traps == |
| − | |||
| − | |||
| − | |||
| − | + | Chests, mimics, suspicious furniture and event props may run a battle, force equipment, move the character or begin an ending. These are not automatically covered by Alert, Thieves' Eye or Float merely because they function as traps in ordinary language. | |
| − | |||
| − | |||
| − | |||
| − | + | The route called [[RyonaRPG/Locations/Trap Cave|Trap Cave]] is part of the Interspecies Village kidnapping incident. Its name does not mean that every trap routine is confined to that location. | |
| − | |||
| − | |||
| − | |||
| − | + | New Game Plus can enable '''More traps''', increasing the number of hazards placed in supported areas. This changes exploration pressure without changing the basic distinction between shared and scripted traps. | |
| − | |||
| − | |||
| − | |||
| − | === | + | == Recovering from a trap == |
| − | |||
| − | |||
| − | |||
| − | + | * '''Poison:''' Antidote, Remedy, Esuna or Panacea. | |
| − | + | * '''Blindness:''' Eye Drops, Remedy, Esuna, Panacea or time. | |
| − | * ''' | + | * '''Silence:''' Book of Curing Silence, Remedy, Esuna, Panacea or time. |
| − | * ''' | + | * '''Paralysis:''' Gold Needle, Remedy, Esuna, Panacea or time. |
| − | * ''' | + | * '''Bleeding:''' Hemostat, Remedy, Esuna or Panacea. |
| − | + | * '''Slime-Coated:''' Holy Water, Remedy, Esuna, Panacea or time, unless an equipped item or active event immediately reapplies it. | |
| + | * '''Captured:''' Press the attack key repeatedly. A Teleport Stone breaks the standard Captured state, but not every scripted capture. | ||
| + | * '''Forced equipment:''' Follow that item's removal system. Cursed rings, collars, restraints and parasites are not all removed in the same way. | ||
| − | + | See [[RyonaRPG/Status|Status]] for full ailment details. If a trap begins a scene or ending, consult [[RyonaRPG/H Events and Endings|H Events and Endings]] instead of treating it as an ordinary status effect. | |
| − | [[ | ||
| − | |||
| − | |||
| − | |||
| − | |||
| − | === | + | == Gallery == |
| − | |||
| − | |||
| − | |||
| − | |||
| − | |||
| − | == | + | <gallery widths="180" heights="120"> |
| − | + | File:RyonaRPG Ether Eater.png|Ether Eater | |
| − | + | File:RyonaRPG Spinning Saw.png|Spinning Saw | |
| − | + | File:RyonaRPG Sparking Rod.png|Sparking Rod | |
| + | File:RyonaRPG Swing Axe.png|Swinging Axe | ||
| + | File:RyonaRPG Tentacle Bed.png|Tentacle Bed | ||
| + | File:RyonaRPG Delta Horse.png|Delta Horse | ||
| + | File:RyonaRPG Tentacle2.png|Tentacle trap | ||
| + | File:RyonaRPG Spider Web RyonaRPG.png|Spider Web | ||
| + | </gallery> | ||
| − | === | + | == Related pages == |
| − | |||
| − | |||
| − | |||
| − | |||
| − | + | * [[RyonaRPG/Abilities|Abilities]] | |
| − | * | + | * [[RyonaRPG/Magic|Magic]] |
| − | * | + | * [[RyonaRPG/Status|Status]] |
| − | * | + | * [[RyonaRPG/Equipment|Equipment]] |
| + | * [[RyonaRPG/Parasites|Parasites]] | ||
| + | * [[RyonaRPG/Curse Level|Curse Level]] | ||
| + | * [[RyonaRPG/H Events and Endings|H Events and Endings]] | ||
| + | * [[RyonaRPG/Locations|Locations]] | ||
Latest revision as of 18:47, 4 September 2026
|
Japanese release Download the latest English edition Gameplay: Technical help: External links: The Japanese uploader and board may require a Japanese VPN on some networks. |
Traps range from hidden floor triggers to visible machinery, capture devices and scripted encounters. Some use the game's shared trap-evasion check; others have their own rules. A character who reliably avoids ordinary floor traps can still be caught by a Bear Trap, struck by a moving saw or pulled into a scripted capture.
Contents
Quick survival guide
- Use the Vigilance stance or enable the learned Alert ability before entering a trap-heavy area.
- Float, Levitation and Flight bypass many floor-based traps, but not every trap in the game.
- Thieves' Eye disables supported random traps while the character is not attacking or charging.
- Status resistance still matters. A trap may fail to deal much damage but leave the character Poisoned, Bleeding, Paralyzed, Silenced or Captured.
- Carry a Remedy, Panacea, Teleport Stone and any area-specific supplies you expect to need.
- Save before interacting with conspicuous beds, restraints, eggs or machinery. Some are encounters rather than ordinary damage traps.
- The Invincible support effect does not prevent trap damage.
How trap protection works
There is no single immunity that covers every object called a trap. The current game uses several overlapping systems.
| System | What it protects against | Important limits |
|---|---|---|
| Shared trap evasion | Most hidden random traps and several named floor triggers | Does not automatically apply to visible machinery, Bear Traps, Demon Flower's Fragrance or scripted captures. |
| Float-compatible avoidance | Many arrows, blades, spikes, shocks and other floor-level triggers | Each trap decides whether Float works. It is not universal immunity. |
| Status resistance | The ailment applied after a trap hits | May prevent or shorten the ailment without preventing damage or the trap animation. |
| Capture resistance | Restraint and capture checks that support it | Scripted captures and special endings may use their own conditions. |
| Equipment-specific protection | The exact routines named by the item or event | Do not assume that protection against ordinary traps covers every set piece. |
When a trap uses the shared check, the game combines the applicable character, stance, ability, magic and equipment effects. A successful check cancels the trap before its main effect. The following are the most useful sources.
| Method | Effect | Notes |
|---|---|---|
| Vigilance stance | Trap resistance +30%; capture resistance +50% | Attack, Defense, Magic and Spirit are reduced by 20% while the stance is active. |
| Alert ability | 25%, 50% or 75% trap-evasion chance at levels 1–3 | Learned in the Ability Space and enabled from Special Menu -> Abilities. Some older in-game explanations call this ability Vigilance. |
| Thieves' Eye | Disables supported random traps | A support spell found through Dokuno Falls and Dokuno Marsh. It is inactive while attacking or charging. |
| Float, Levitation or Flight | Automatically bypasses compatible traps | Particularly useful against floor triggers. Bear Traps and some scripted hazards ignore it. |
| Karakroid Shield | Prevents supported traps from triggering | It also has an explicit exemption from Demon Flower's Fragrance. This still does not guarantee immunity to every moving or scripted hazard. |
| 10-Foot Pole | Excellent trap avoidance | The weapon is deliberately slow. |
| Kunoichi Mail | Improves capture and trap resistance | The item description does not display a numerical rate. |
| Dance Robe [Ame-no-Uzume] | Trap evasion +25% | Requires current Charm of 60 or higher. See Charm. |
| Warrior type | Trap evasion +10% | A passive class-type bonus. |
| Fate Spin | Forces supported random checks toward their best result | Helps with the shared routine, but does not make a non-random scripted hazard evadable. |
The No Resistance stance disables evasion abilities. A character using it should expect supported traps to connect even if Alert or another evasion effect is enabled.
Several characters also have innate protection. Examples include Ultima, Carmilla and Lilith's Float or Levitation, Yuffie's trap-evasion bonus, Fairy's Flight and Cherie's Hawk Knight avoidance. See Characters for the exact character mechanics.
Hidden random traps
Hidden random traps select their effect when triggered. The trap's name is shown near the upper-right corner of the play area. The ordinary and strong pools have different contents.
Standard random trap
| Result | Chance | Typical effect |
|---|---|---|
| Poison Arrow | 20% | Damage and Poison |
| Invisible Blade | 20% | Physical damage, often with Bleeding |
| Electric Shock | 20% | Lightning damage and Paralysis |
| Demon Flower's Fragrance | 20% | An arousal-related effect checked through its own routine |
| Seal | 10% | Silence or magic restriction |
| Darkness Trap | 10% | Blindness |
The shared random-trap routine is used most heavily in Demon Castle Gaddem, with smaller groups in several other late-game and trap-focused areas.
Demon Flower's Fragrance is the exception inside this pool. Generic trap evasion and Float do not avoid it. Status resistance remains useful, while the Bio-Rubber Suit and Karakroid Shield have explicit protection in its event.
Strong random trap
The stronger pool appears chiefly in late-game areas such as Demon Castle Gaddem and Floating Continent Laputa. Every result selected by this pool uses the shared evasion check.
| Result | Chance | Typical effect |
|---|---|---|
| Flame Pillar | 25% | Heavy fire damage |
| Poison Arrow | 12.5% | Damage and Poison |
| Invisible Blade | 12.5% | Physical damage, often with Bleeding |
| Electric Shock | 12.5% | Lightning damage and Paralysis |
| Handcuffs | 12.5% | May force Slave Princess's Handcuffs onto the character |
| Ether Eater | 9.375% | Consumes Ether from the inventory |
| Magic Seal | 9.375% | May force a Magic-Sealing Collar onto the character |
| Seal | 6.25% | Silence or magic restriction |
Common named traps
The table summarizes recurring trap routines rather than every individual tile. Placement and exact damage can vary by map.
| Trap | Main effect | Shared evasion? | Notes and common areas |
|---|---|---|---|
| Poison Arrow | Damage and Poison | Yes | Float-compatible. Common in the Dwarven Great Tunnel, Villains' Valley, Mountain Cave and Suspicious Temple. |
| Darkness Trap | Blindness | Yes | Float-compatible. Used in the Dwarven Great Tunnel, Forgotten Mansion, Ancient Library and Suspicious Temple. |
| Invisible Blade | Damage and Bleeding | Yes | Float-compatible. Mage Armor reduces its damage. Common in the Forgotten Mansion, Suspicious Temple, Undersea Temple and Demon King's Palace. |
| Spike Floor | Physical damage | Yes | Float-compatible. Used in the Forgotten Mansion, Pyramid, Dwarven Great Tunnel and Suspicious Temple. |
| Electric Shock | Lightning damage and Paralysis | Yes | Float-compatible. Found in Floating Continent Laputa, The Astral, Lionel Ideology Church and Suspicious Temple. |
| Seal | Silence or magic restriction | Yes | Float does not automatically cancel this trap. Found in the Dwarven Great Tunnel, Mullonde Necromancy Hall, Villains' Valley and Suspicious Temple. |
| Freezing Gas | Ice damage and Freeze | Yes | Float-compatible where the shared trigger is used. |
| Flame Pillar | Heavy fire damage | Yes | Used prominently in Suspicious Temple and Floating Continent Laputa. |
| Ether Eater | Removes 1–3 Ether | Yes | The inventory loss occurs only if the trap connects. |
| Curse Ring | Forces one of several cursed rings onto the character | Yes | Removal follows the cursed-equipment rules. See Curse Level. |
| Handcuffs | May force Slave Princess's Handcuffs | Yes | A restraint trap in the strong random pool and some individual placements. |
| Magic Seal | May force a Magic-Sealing Collar | Yes | Separate from the ordinary Seal result. |
| Tentacle Stripping | Removes equipment | Yes | Bio-Rubber Suit and Tentacler Z are explicitly protected from this routine. |
| Flesh Rope | Forces Flesh Rope equipment | Yes | The forced equipment has its own removal rules. |
| Cordlike Parasite | Forces Cordlike Parasite equipment | Yes | The internal trap routine is also used by bondage-themed triggers. See Parasites. |
| Sticky Mucus | Inflicts Slime-Coated | Yes | Bio-Rubber Suit and Tentacler Z are explicitly protected. |
| Trip Stone | Knocks the character down or interrupts movement | Yes | Float-compatible. Used on the Ayakashi Mountain Path. |
| Alarm Device | Activates an area-specific alarm response | Yes | The consequence is controlled by the surrounding map event. |
| Meteor | Heavy scripted damage | Yes | Used in The Astral. |
Fixed and moving hazards
These traps usually have visible map objects, movement patterns or their own event logic. Their behavior cannot be inferred from the shared random-trap rules.
Spinning Saw
Moving saws deal damage, can cause Bleeding and may knock the character away. They are especially associated with the Undersea Temple and Execution Tower. Watch a full movement cycle before crossing a narrow lane.
Sparking Rod
Electrical rods deal damage and can inflict Paralysis, Bleeding or Fallen depending on the version and area. Some variants are Float-compatible; do not assume that every sparking obstacle uses the same event.
Swinging axes, lances and falling objects
Swinging axes, giant lances, logs, boulders, meteors and iron balls use map-specific timing. Some deal a fixed amount, while others scale from maximum HP. The Lomei Labyrinth is particularly dense with visible spears, cutters, arrows, lava and rolling discs. Demon King's Palace uses several heavy falling-object traps, while the Ayakashi Mountain Path uses trip stones and logs.
Bear Trap
Bear Traps are hidden restraints used most prominently in Villains' Valley. They do not use the generic trap-evasion check, and Float does not protect against them. Status resistance can still help. If the character is Captured, press the attack key repeatedly to escape unless the surrounding event gives different instructions.
Spider Web
Spider Webs restrain the character and are common in Norsley Sea of Decay and the Poison-Insect Labyrinth. The exact follow-up depends on the nearby enemies or event.
Giant Insect's Mouth
Some insect areas disguise a capture or damaging trigger as part of the terrain. These use their own routine rather than the standard random-trap pool. Treat suspicious organic openings as encounters, not safe scenery.
Writhing Cave floor traps
The Writhing Cave contains faintly glowing floor triggers, tentacles, organic spikes and capture hazards. Vigilance can evade supported floor traps, but the cave also contains enemies and scripted contacts that use separate checks.
Tentacle Bed
Tentacle Beds appear in places including the Poison-Insect Labyrinth, Norsley Sea of Decay and scripted torture areas. They are capture events rather than ordinary damage tiles. The character may be restrained, drained and stripped of items or equipment. Failing or refusing to escape can advance a special route, including the persistent Kodoku Broodbed outcome described under H Events and Endings. Save before interacting if you do not want to enter that route.
Treasure and scripted traps
Chests, mimics, suspicious furniture and event props may run a battle, force equipment, move the character or begin an ending. These are not automatically covered by Alert, Thieves' Eye or Float merely because they function as traps in ordinary language.
The route called Trap Cave is part of the Interspecies Village kidnapping incident. Its name does not mean that every trap routine is confined to that location.
New Game Plus can enable More traps, increasing the number of hazards placed in supported areas. This changes exploration pressure without changing the basic distinction between shared and scripted traps.
Recovering from a trap
- Poison: Antidote, Remedy, Esuna or Panacea.
- Blindness: Eye Drops, Remedy, Esuna, Panacea or time.
- Silence: Book of Curing Silence, Remedy, Esuna, Panacea or time.
- Paralysis: Gold Needle, Remedy, Esuna, Panacea or time.
- Bleeding: Hemostat, Remedy, Esuna or Panacea.
- Slime-Coated: Holy Water, Remedy, Esuna, Panacea or time, unless an equipped item or active event immediately reapplies it.
- Captured: Press the attack key repeatedly. A Teleport Stone breaks the standard Captured state, but not every scripted capture.
- Forced equipment: Follow that item's removal system. Cursed rings, collars, restraints and parasites are not all removed in the same way.
See Status for full ailment details. If a trap begins a scene or ending, consult H Events and Endings instead of treating it as an ordinary status effect.
Gallery

Ether Eater

Spinning Saw

Sparking Rod
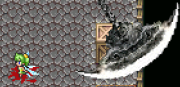
Swinging Axe
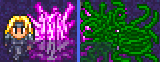
Tentacle Bed

Delta Horse
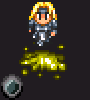
Tentacle trap
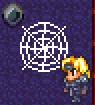
Spider Web


