|
|
| Line 71: |
Line 71: |
| | | 31. ||style="background: #FFDDF1;"|[[File:koi_g25_sunshaft.png|500px]]|| Sunshafts aren't available too.<br><br>''You can use the default blank map to see the effects of Fog and Sunshafts'' | | | 31. ||style="background: #FFDDF1;"|[[File:koi_g25_sunshaft.png|500px]]|| Sunshafts aren't available too.<br><br>''You can use the default blank map to see the effects of Fog and Sunshafts'' |
| | |- | | |- |
| − | | 32. ||style="background: #FFDDF1;"|[[File:koi_g26_shadow.png|500px]]|| Final touch on the Graphics settings is.. Shadow. I used Slight, Smooth Shadows on this one. All the other settings beside ''Editor Main Settings'' are saved in the Scene File. (see step no.14) | + | | 32. ||style="background: #FFDDF1;"|[[File:koi_g26_shadow.png|500px]]|| Final touch on the Graphics settings is.. Shadow. I used Slight, Smooth Shadows on this one. <br><br>Remember: All the other settings beside ''Editor Main Settings'' are saved in the Scene File. (see step no.14) |
| | |- | | |- |
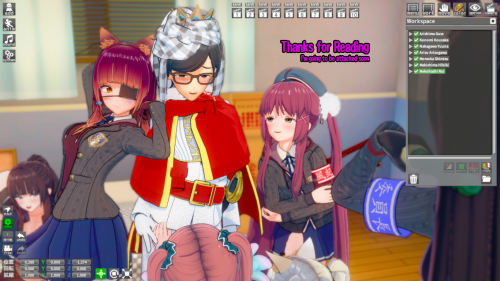
| | | 33. ||style="background: #FFDDF1;"|[[File:koi_g27_end.png|500px]]|| Thanks for reading this lengthy basic introduction guide, we hope you can create your own fantastic scene later. | | | 33. ||style="background: #FFDDF1;"|[[File:koi_g27_end.png|500px]]|| Thanks for reading this lengthy basic introduction guide, we hope you can create your own fantastic scene later. |
Chara Studio is a powerful editor that lets you create a scene using the characters, animations, models, sounds available from the game.
Below is a detailed 33-steps picture-to-picture that cover the basics with explanation to get you started into the editor.
| 1. |
 |
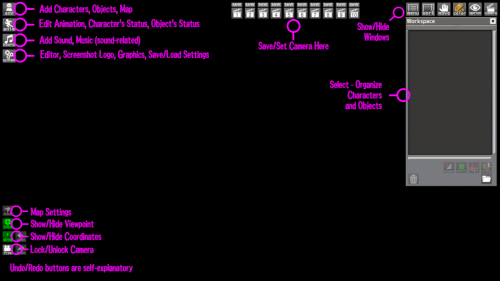
When you open the editor, you will be presented with a default black screen as seen in the picture. Basic explanation on each button are explained in the picture.
|
| 2. |
 |
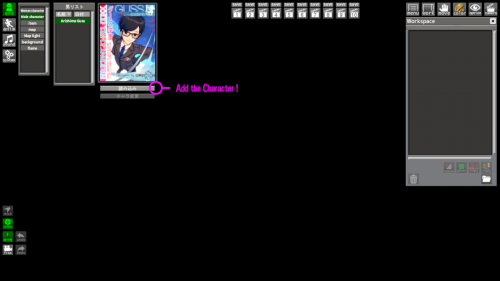
Let's add the character!
add -> female/male character -> [YOUR CHARACTER HERE]
|
| 3. |
 |
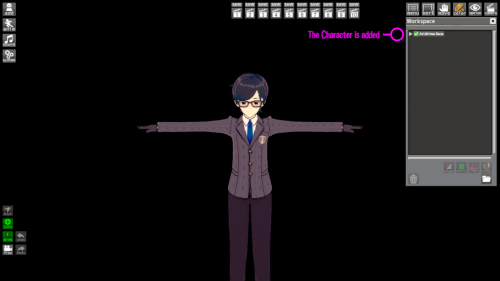
The Character is added! as seen in the workspace tab just on the right
|
| 4. |
 |
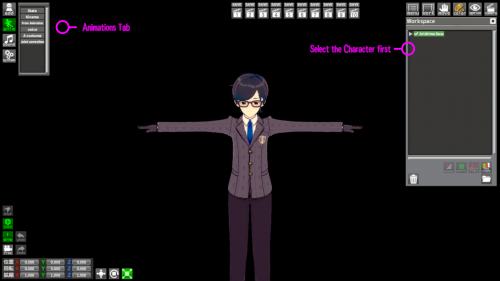
Now select the character, and then open up the Animations tab
|
| 5. |
 |
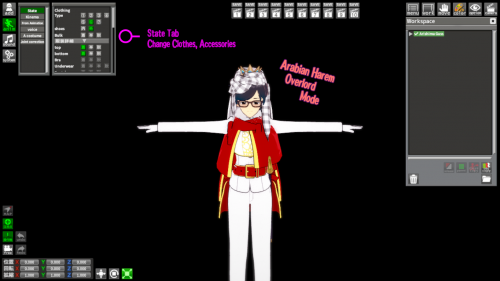
Using the State Tab, you can change the character's clothes (school, swimming, date etc.) and accessories, the condition of the clothes (Closed, Half-Opened, Naked)
|
| 6. |
 |
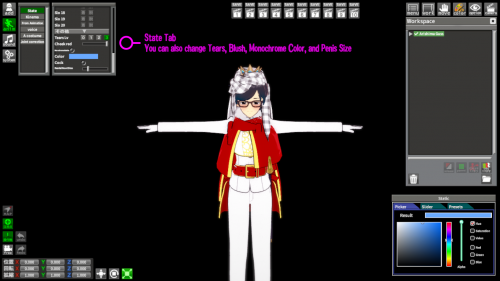
You can also change tears level, cheek blushes, monochrome color (for men), penis show/hide, and penis size
|
| 7. |
 |
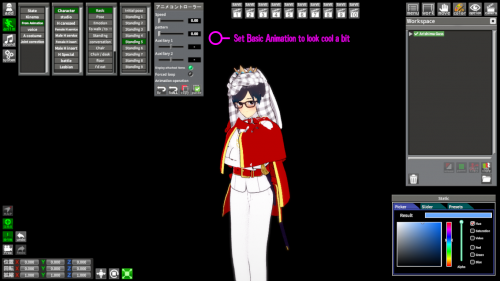
Now, I went fast to adjust the animation (anim->from animations) to make the character look cool a bit while we changing the Kinema Tab
|
| 8. |
 |
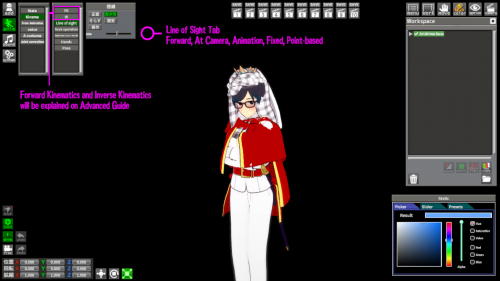
Onto Kinema, Line of Sight is to set up the Eyesight on where to look.
*Note that we intentionally skipped the FK (Forward Kinematics) and IK (Inverse Kinematics) for advanced guide later.
|
| 9. |
 |
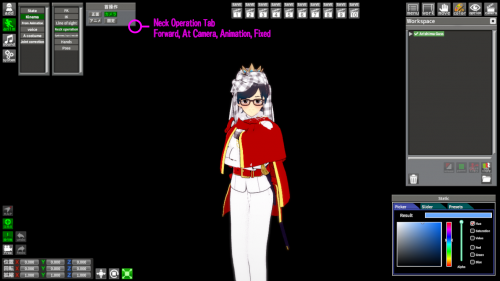
On Neck Operations Tab, we can change on how the neck behaves. Either Forward, At Camera, Animation-based, Fixed.
|
| 10. |
 |
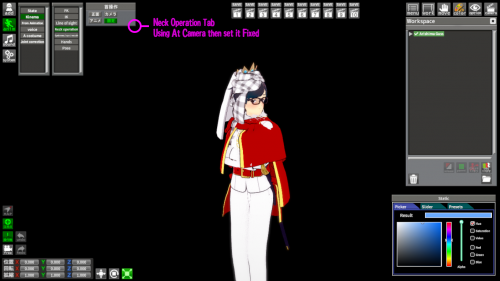
By using At Camera, then set it to Fixed, we can get a result like shown on the left.
|
| 11. |
 |
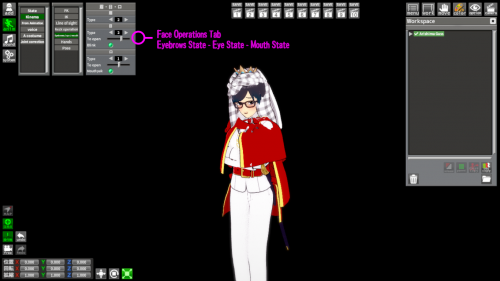
On Face Operations Tab, we can change eyebrows, eyes, and mouth type.
|
| 12. |
 |
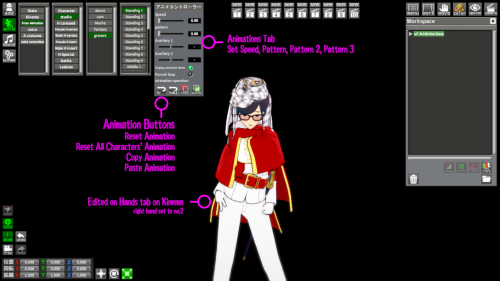
Since I got bored with the previous animation, why don't we get a more "offensive" animation. Notice that I changed the right-hand by using the Hands Tab, located just below the Face Operations Tab before
|
| 13. |
 |
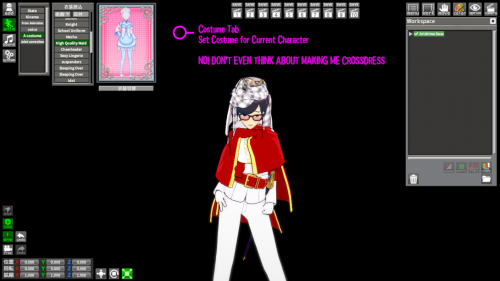
On Costumes Tab, you can change the character's costume
|
| 14. |
 |
*skipped the Sounds Tab intentionally because it seemed simple to understand*
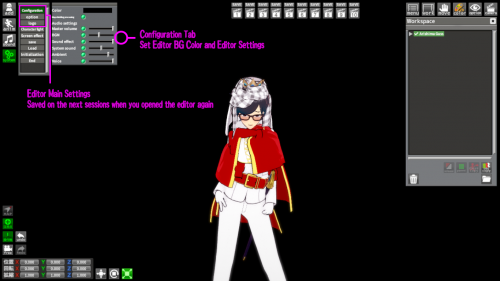
Onto System>Configuration, here we adjust the editor default settings. The first three (Editor Main Settings) are saved on the next session you opened the editor again. The rest are saved on each Scene file on PNG.
|
| 15. |
 |
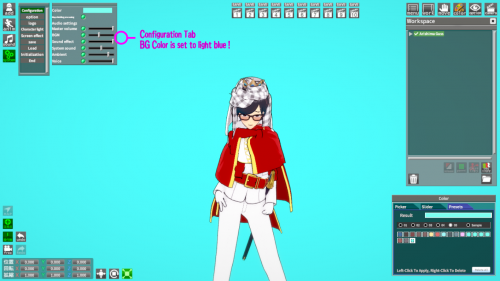
Changed the BG Color to Light Blue.
|
| 16. |
 |
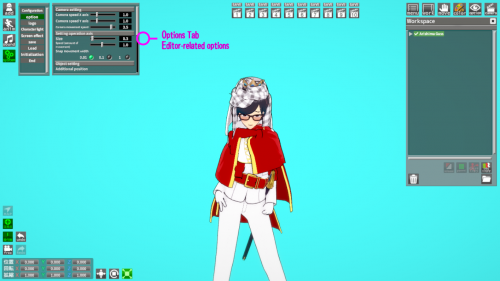
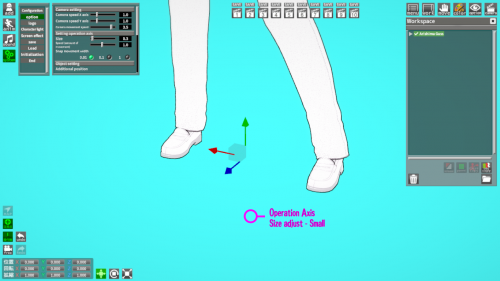
On the Options Tab, the settings are related to how the editor operates (like adjusting the size of the cursor)
|
| 17. |
 |
Here is my default editor cursor, set at 0.3 size
|
| 18. |
 |
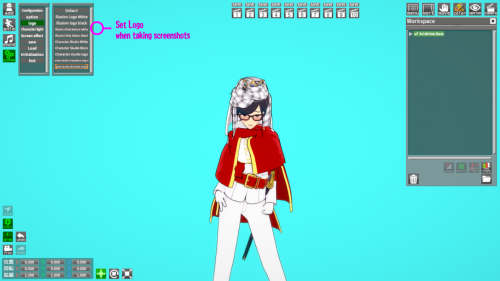
Logo tab is for changing the Logo (Located lower-right from the screen) when you take screenshot of your scene in the Editor
|
| 19. |
 |
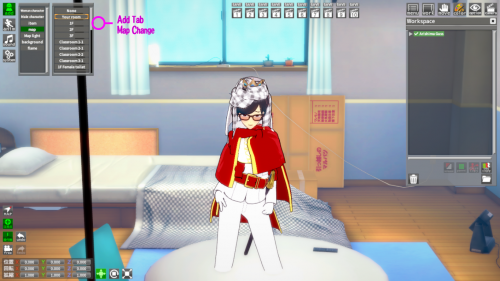
Back to the Add Tab, here we can change the map, back to the classy protagonist room
|
| 20. |
 |
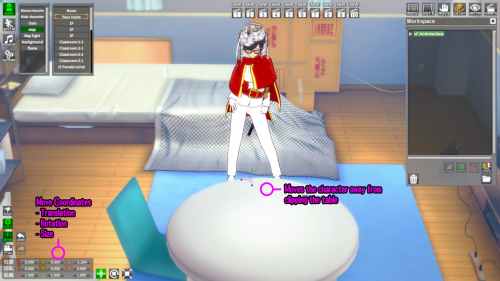
Since the character magically clipped into the table, so we adjust the positions using the editor cursor (you can also change it from the coordinates!)
|
| 21. |
 |
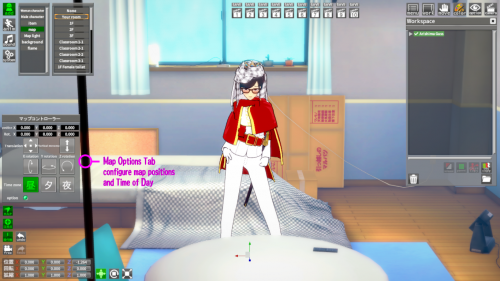
Now we open up the Map Options Tab, to adjust the map position, rotation, and time of day
|
| 22. |
 |
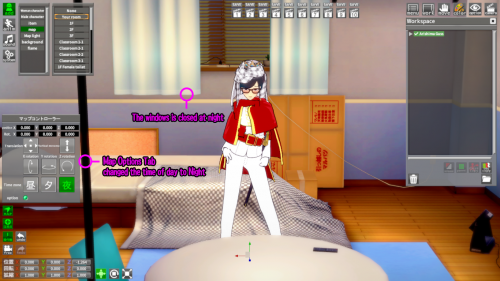
Changing the map's time of day have an effect. For example, At Night, your room's windows are closed
|
| 23. |
 |
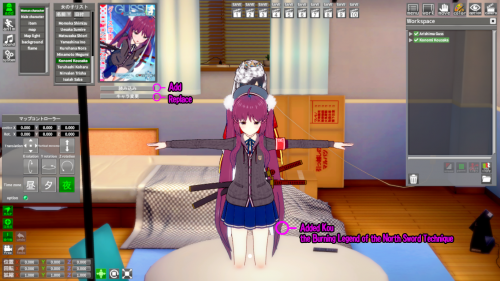
Let's add new character to fill up my loneliness in this guide, her name is Kou, My 18th waifu (out of 30), she's playful and cute, will help us explaining this guide.
|
| 24. |
 |
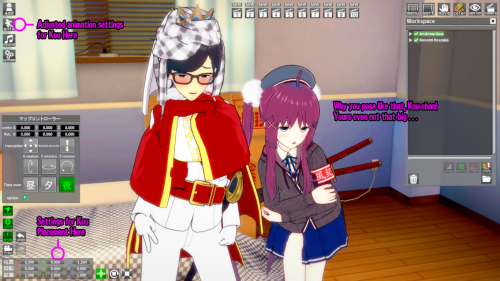
Using the same settings, Kou is made to pose beside me.
|
| 25. |
 |
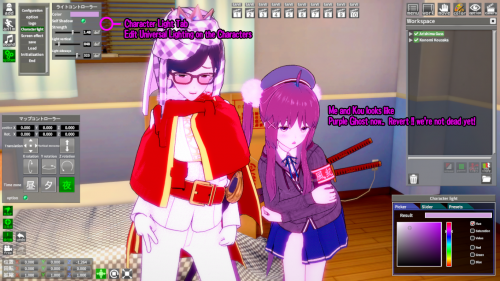
After the Logo Tab, we move on to the Character Light Tab, we can change the light color, self shadow on/off, the strength of the light, Vertical and horizontal light placement. Different from the Editor Main Settings, this settings and below are saved on Each Scene File. (see step no.14)
|
| 26. |
 |
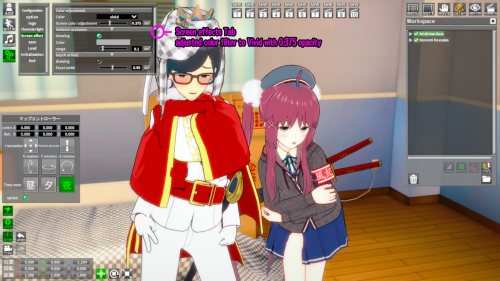
On the Screen Effects Tab, I change the color filter to Vivid with 0.375 opacity, highest value at 1 will removes the color filter completely.
|
| 27. |
 |
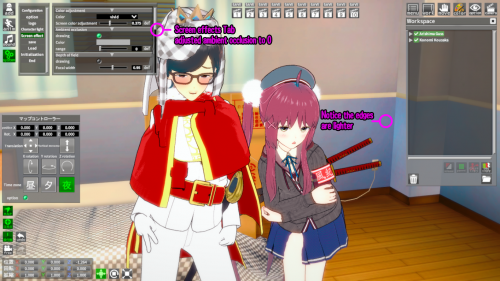
Ambient Occlusions set to 0, no dark areas seems lighter
|
| 28. |
 |
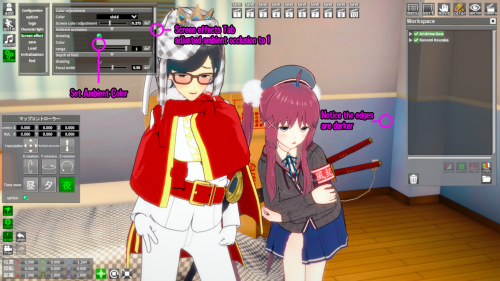
Ambient Occlusions set to 1, edges (including character's) are darker
|
| 29. |
 |
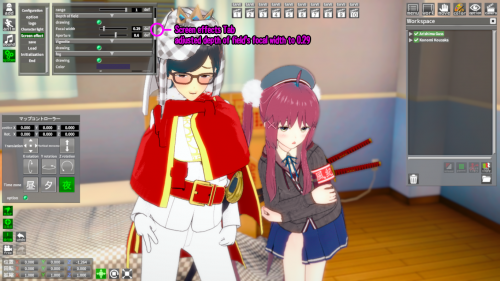
Depth of Field's Focal Width set to 0.29 (This is the Range) Aperture is the intensity of the blur.
|
| 30. |
 |
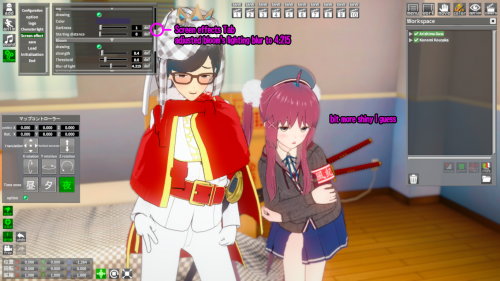
Turned On Bloom settings with lighting's blur to 4.215, Fog cannot be seen in this map.
You can use the default blank map to see the effects of Fog and Sunshafts
|
| 31. |
 |
Sunshafts aren't available too.
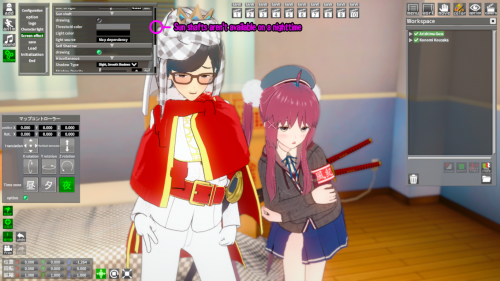
You can use the default blank map to see the effects of Fog and Sunshafts
|
| 32. |
 |
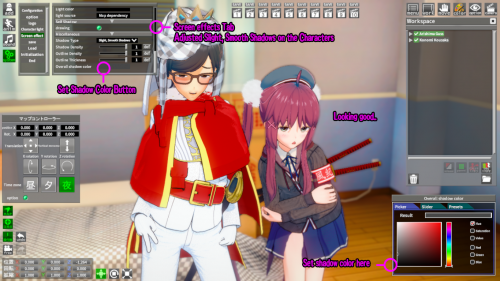
Final touch on the Graphics settings is.. Shadow. I used Slight, Smooth Shadows on this one.
Remember: All the other settings beside Editor Main Settings are saved in the Scene File. (see step no.14)
|
| 33. |
 |
Thanks for reading this lengthy basic introduction guide, we hope you can create your own fantastic scene later.
|
| EX. |
 |
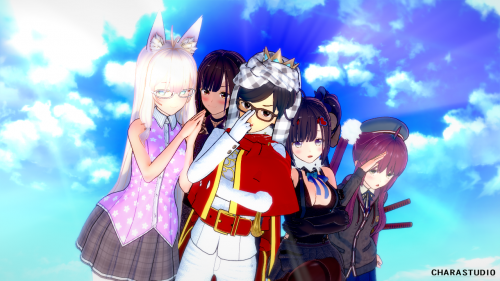
Other Simple Example of a Scene using all the explanation made by this Guide
this example scene utilizes a slight blue-colored fog on the bottom and sunshafts
|

