TamuTamuSu~ru
- Recent changes
- All pages
- Wiki tutorial
- Purge (this page)
all characters are at least 18
Supporting Games
This is a general guide to using Teatime's たむたむす~る character editor for Houkago Custom Time, LoveGear, Karemachi Kanojou and Love Death Final! to create characters, outfits (including weapons,) poses and animations, and download or upload through Tamzone.
Contents
Overview
This is the character maker and editor for LGKL games, from v1-2.0 (Houkago Custom Time) through 3.0 (LoveGear) and 4.0 (Netowaku Netorari Karemachi Kanojo) to 5.0 (Love Death Final!).)
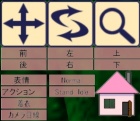
Quick buttons to the upper right in all versions control the camera; panning, rotating, zooming, and reseting to direct angles from front, back, left, right, above, and below. From v3.0, buttons below select character expression, custom animation, show/hide clothing, gaze at camera or directly forward. Beneath those, the Tam-tam sprite offers helpful comments and links to tutorials, but she can be dragged and dropped anywhere when her placement is less than helpful. Dragging her over her house will remove her from view, and she can be called back out by double-clicking on her home. In v3.0 (Lovegear version), Ms. Ana's sprite takes her place.
Up to v3.0, the Main Heroine icons can quick load the story's heroines, save your current character to take their place in the story, or restore them from the original files.
In v4.0, a tutorial arrow will appear in the lower right; clicking on it will take you on a guided tour of the menus. Note: This will require changes to your current character that won't be restored or restorable, so you may wish to try this with a freshly loaded or saved one. Keypad-Home will exit the tour at any time.
Manage Data
Save/Load
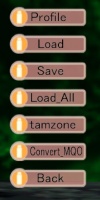
Characters can be saved or loaded, and any types of model/morph/paint set can be loaded here, or from their own submenus where they can be saved.Note the file types to locate them in your /save directory in case you wish to rename or delete them, or store files downloaded from outside the editor.
- Face - (*.fsp), in Face/
- Hair - (*.hrp), full hairstyles, in Hair/
- Body - (*. bbs), in Body/
- Clothes - (*.wbs), full outfits, in Wear/
- Load All - (*.alp), full characters in Allpack/
Tamzone
This connects to Teatime's server for filesharing Tamtam's file types. Of the above types, only full characters and full outfits can uploaded or downloaded, and these types in addition:
- Pose - (*.pos), a single frame for a single character in Anime/
- Animation - (*.anm), full animation for a single character in Anime/
- H Animation - (*.han), full, two-character H animation in Anime/ (currently no animations for 3+ characters can be made or transferred)
- Dance - (*.dnc), full length dance animation in Anime/
- Import - (*.icp) single items converted from *.mqo or custom extracted from outfits in Import/ (more detail in next section)
Convert MQO
This opens a file selection to browse for objects created in Metasequoia 3D format. Initially, you must select a custom slot for type of Hair, Accessories, Weapons or Objects, and it will be stored as such locally, to apply to any character.
But these will not be transferred with characters or outfits, as any other game installation will have it's own selection in those slots. By saving them from the Clothing menu as Custom articles, they will be kept in .icp files which can be uploaded through tamzone, and if saved with characters and outfits, will be accessible to other players who download them.
Profile
This displays the current character's basic personality for review and editing, and will only be saved in full character files. Some options and stats are presented with Tamtam's (or Ana's) colorful commentary to the right.
- Name - Can be in romaji or kanji/kana, but must be entered in JIS/Shift-JIS -- see the FAQ
- Birthday - Month and Day of birth
- Job - automatically set by the character's current outfit (what would their guidance counsellors say?)
- Measures - Bust/Waist/Hips, automatically set by Body dimensions
- Sex Experience - Virgin, Vaginal Only, Anal Only, Both
Personality
Personality types determine which voice is spoken from the character in game, and differences in their base averages to the params below influence their behavior somewhat. The personality types available depend on the game the editor version was created for, but personalities imported from previous games are fully supported in later games.
Houkago Custom Time Heroines
- Nodoka [CV: Nakaya Shiho] - bubbly and energetic voice, often nervous and insecure.
- Tamtam [CV: Azuma Karin] - elegantly spoken, uses archaic language, somewhat condescending to 'mortals' but also helpful
- Chisato [CV: Ogura Yui] - Vain, competitive and very tsundere
HCT+LG Extra
- Little Sister [CV: Yukimura Toa] - bright and loving, inexperienced but curious
- Older Sister [CV: Suzune Kagetsu] - wise and sometimes firm, experienced and highly sensuous
- Suave Sister [CV: Kasumi Ryou] - kuudere, even-tempered and sometimes quietly snarky
- Little Brother [CV: Yuzuki Sachi] - quiet and somewhat sullen, sometimes sounds tough to mask vulnerability
- Innocent Girl [CV: Ueda Akane] - sweet and cheery, has a somewhat rustic accent
LoveGear Heroines
- Ms. Ana [CV: Kawashima Rino] - college student and tutor, knowlegeable and...worldly
- Makina [CV: Nakata Junko] - adoring little sister, highly respectful and possessive of her brother
KareKano Heroines
- Cocoa [CV: Oukawa Mio] - childhood friend, very gently spoken, somewhat flaky
- Saki [CV: Azuma Karin] - younger cousin once engaged to Hero, chatty and somewhat forward in her affection
KareKano Extra
- Silent Gentleman - no character at all, intended for the Hero. No Scenario is associated with this character, and no voices will play
- Aki [CV: Kasumi Ryou] - younger type and another little sister, but more self-willed
- Maturi [CV: Shirotsuki Kaname] - same age and former classmate with a crush, gentle and breathy voice, romantic
- Momoka [CV: Yukimura Toa] - older type recently graduated, with a somewhat motherly attraction to younger
Love Death Final! Heroines
- Eir - Devoted martial artist and village protector on a solo search-and-rescue for her lover Aaron
- Rota - Cheerful and whimsical magical prodigy, determinedly follows her lover Clive against the village elders' concern
Love Death Final! Rivals
- Nanami [CV: Hokuto Minami] -
- Urara [CV: Oukawa Mio] -
- Ichigo [CV: Aoba Ringo] -
- Koto [CV: Kawashima Rino] -
- Ayumi [CV: Serizono Miya] -
- Minamo [CV: Aokawa Nagare] -
- Kaede [CV: Kanamatsu Yuka] -
- Kaoru [CV: Kanamatsu Yuka] -
- Yuuki [CV: Tamiyasu Tomoe] -
- Itsumi [CV: Nakata Junko] -
Statistics
These determine a character's behaviors and abilities, in Free, Touch, or H Modes. They're randomly generated when Personality or Sex Experience is selected, but each Personality has a few stats with higher or lower base averages for the roll, and Sex Experience can modify one or more Sensitivities. It's unknown whether Birthday has any influence.
The Silent Gentleman personality always starts with the base 500's in all stats, and will not reroll.
| Stat | Effect | >avg types | <avg types |
|---|---|---|---|
| Intelligence | unknown | ||
| Temper | anger AI | ||
| Crybaby | crying AI | ||
| Fear | afraid/nervous AI | ||
| Neatness | unknown | ||
| Power |
attack effectiveness with any weapon type |
||
| Sadism | chance of taking H initiative | ||
| Masochism | unknown |
Sensitivities -- Kiss, Pussy, Anal, and Penis -- determine the rate of arousal gain during contact with each erogenous zone.
In Houkago Custom Time and LoveGear, all Stats can be modified by various consumables; books, foods and drugs, and all Sensitivities increase gradually with Touch or H mode stimulation (this may also be the case in KareKano; requires confirmation.) Full Item Descriptions (when it's written.)
Model Menus
All of these provide a variety of base models, simple selection and slider modifiers, and depending on version, Morph and/or Paint menus. Each of them have save/load options for their own file types.
Face
Morph and Paint are available for all versions.
- Face Type - These are based on heroine models from many Teatime Games, most notably the LoveDeath series. Each has a unique appearance to work from, with different features and expressions available, and may vary in their morph/paint properties.
- Eye Type - Unique base eye textures, some may also have different eye layers available, and animate differently in certain expressions. Paint tools will not change the textures, but can paint over them.
- Eye Color - A selection of base colors, these can all be modified or fine-tuned in Paint
- Preferred Display (v4.0+) - sets whether eyes, eyebrows, or both will display through hair
- Shape Slider - shifts intensity of facial Morphing, blending it more or less with the original head model, or completely excluding original or morphed form
Hair
Morph is available for all versions, Paint is not available for any, so only Color options listed can modify the color.
- Highlight - set the shininess with various specular patterns, some which also blend in colors.
- Color Range - set whether color sliders adjust RGB or HSV values
- Color Base - Color uses the hair's texture as a base, Gray changes it to a neutral grayscale.
- Color - The RGB or HSV sliders. These will be applied to all hair models, some which may vary in appearance if they have a particularly bold or distinct texture.
- Hair Styles - selects from base Front, Back, and Extra models to mix and match
- Hair Length - sliders for selected Front, Back, and Extra hair lengths
- Custom Mesh - Morph Menu; Front, Back and Extra meshes are all separately morphable.
Body
Morph and Paint are only available for v4.0+.
- Gender - Female, Futa or Male. All genitals are included with all model types, this selects which will be displayed and active in H-scenes.
- Body - various body models, including lower poly versions for A, B, and C types. Because the body morphing in v4.0+ is heavily model-dependent, the version the character is saved with is the version that will appear on all computers, whether configured for low quality models or not.
- A-Type - most generic body type with fewest graphical and material features. A basic female form.
- B-Type - a more curvy form, with more detailed built-in morphs to adjust curves with the sliders. Unfortunately very little clothing support, so there are few options to build a wardrobe from. Figure asymmetry makes this body challenging to morph.
- C-Type - same form as A-Type, but with more material values, including shininess. Also includes a layer to display topical application of semen.
- P-Type - a basic male build, intended for a Male Player/Protagonist, but can be set to Female or Futa with accompanying sexual characteristics. This is already a lower poly model, limiting the body morphing range. This also has a built-in head, so Face model cannot be selected, morphed or painted. There is also very few compatible clothing meshes, so wardrobe choices are limited.
- Skin Color - selects from skin textures with varying tones and color patterns, light or deep tans or tanlines.
- Nipple Type (v4.0+) - select from three nipple textures with varying slider properties
- Nipple Color (v4.0+) - Palette controls to adjust nipple tone. Note that using the Paint menu Palette controls to adjust the full body tone will also modify this color
- Proportions - adjust length of Neck/Torso/Shoulders/Arms/Hands/Legs
- Figure - adjust size of body features, particularly Waist/Hips/Belly/Breast Size/Cup/Nipple Size and Penis Size when applicable. Measurements for Bust/Waist/Hip display below the sliders, updating with any changes.
- Body Fat - Mostly affects thickness of thighs, but influences many features, and can give the appearance of muscle.
- Panty Tightness - Increases the 'bite' where the panty line is, the depth of indentation into the skin. Full body 'panty' meshes, such a swimsuits, do not trigger this effect.
- Tight Socks - Toggles whether the top of socks and stockings also 'bite' into the thighs or calves. Stocking items included in clothing sets do not trigger the effect.
Clothes
Morph and Paint are only available for v4.0+.
- Headgear - 3 slots for accessories and cranial...things
- Bra/Panties - many matching sets and some full body clothing. Any panty mesh worn will conceal genitals and mosaics. Bras may be revealing, but panty crotches will always exactly cover the same area, and cannot be morphed (but can be painted.)
- Clothing - 5 slots of clothing that can be 1-4 subslots of their own, each independently toggleable to mix and match pieces (with varying degrees of clipping between them...)
- Weapon - Right and Left hand wieldable and holdable items. Non-weapon accessories will get default strike properties in combat, as will empty hands. Everything here is trying to kill you.
- Shoes - Any footwear except for socks and stockings, which will be single-slot Clothing items.
- Adult Toys - Mouth/Asoko/Anal slots for erotic items (or maybe not, but everything is erotic to someone.) Items occupying slots will continually increase the character's Ecstasy and Sensitivity for the matching zone, in Free Mode, Touch Mode, and H Modes. In Talk Mode these won't affect Ecstasy or Sensitivity, but the character will randomly vocalize responses to them.
- Custom (v4.0+) - All of the above slots must be individually selected for Morphing or Painting, or can be saved or loaded separately.
Chibi
Only available for v2.0, with no Morph or Paint menus. In v3.0, Chibi bodies were only used in separate DLC executables, and automatically generated for Nodoka, Chisato, Tamtam, the Hero, Ms Ana and Makina, with basic Face and Hair meshes. Chibi bodies are not included in v4.0.
- Auto-Match - will attempt to match Face and Hair basic meshes and color selection.
- Head/Eyes/Eye Color - specifically selects from a few options
- Body - selects from girls' or boys' uniforms, or Tamtam's robes.
Morph
Added to the upper right Quickbuttons are Undo, Quick Save and Quick Load. Shift-Z will also Undo, and Shift-Y will Redo, but on occasions these aren't working correctly, the Undo may still work. Quick save and load will store and reload one morph set. One of each model type (Face/Hair/Body/Clothes) can be saved (in save/Quicksave directory) until overwritten by a new quicksave of that type.
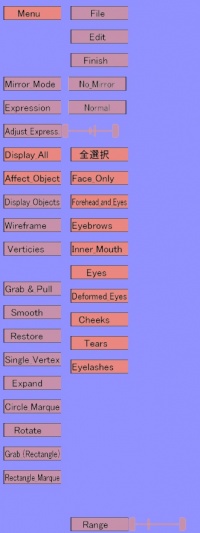
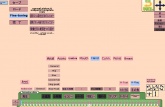
The image to the right shows the Face Morph interface; all Morph screens have the same general features with a few exceptions to be explained below.
Menu
The top button drops a few submenu selections:
File - Reset will clear all morphs and restore the original mesh shape, Save/Load stores and loads data to locations and file types dependent on the model type.
- Face Morph Set (save/Face/*.fms) - saved/loaded data can be subselected from the list of effect objects shown to the right, but if the morph data requires a certain head model to support (eg; eyelashes,) that will be loaded.
- Hair Morph Set (save/Hair/*.hms) - these are separated into Back, Front and Other and can only be saved or loaded to the matching type
- Body Morph Set (save/Body/*.bms) - these are model dependent, so save only for one body type (A/B/C/P) and will not load if a different type is currently selected.
- Import Morph Set (save/Import/*.ims) - also model dependent, and will load the model into that item slot if not currently selected. It will also load onto Body types otherwise restricted from selecting that item.
Edit - The Undo/Redo buttons here aren't completely redundant -- in the event Shift-Z and the Undo quickbutton fail, these sometimes work. If you reach a point where you have to try it, you may wish to save whatever progress you can recover, then exit and reload.
Finish will exit the morph interface, clearing Undo/Redo history.
Selection
A few toggles and tools hide or show parts of the model or restrict which parts of it will be edited. Since morphing tool are applied not just to the immediately visible parts but all vertexes in their range, these can be very important to controlling editing area and minimizing unintended effects.
Display/Affect
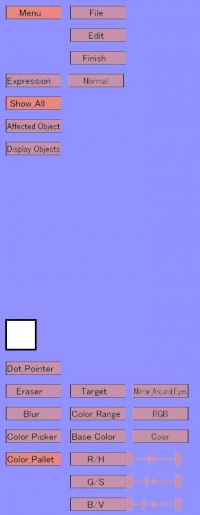
Display All hides/reveals all models that aren't part of the currently editable mesh object. The other Display/Affect options vary by Model Menu:
The Face selection has the greatest variety of subsections; these are shown in the image.
Available Hair selection varies greatly by position and the submeshes in the original hair model, with generally self-explanatory labels.
Body options are Body and Liquid, which is the layer which displays semen covering (not used in A or P type bodies.)
Clothing options are divided by subslots where applicable. These may or may not be meaningfully labelled, so the surest way to determine which parts you're affecting is to either toggle off the parts you don't intend to edit in the Clothing Menu, or toggle them in the Display list.
Mirror
Mirroring Left to Right or Right to Left not only applies all morphing symetrically to the opposite side, but also prevents tools from directly affecting them. Working at an angle from one side puts the opposite side directly across from your brush, and with mirror on, you don't have to worry about unexpected deformation occuring beyond your view. This also allows you to focus morphing on features close to the center.
A few central vertexes aren't mirrored, so will not be affected while Mirroring is on -- unfortunately they're in delicate positions, and have to be included in major modifications of some of the finer features. Use this carefully; minor deviations from symmetry tend to accumulate with modding, making it much more difficult to predict the effect of Mirroring later.
Rectangular Marquee
If sectioning and mirroring aren't enough to isolate intended areas, the rectangle marquee can select or exclude vertexes. The Vertex toggles display of vertexes; red ones are selected, blue are deselected from editing. Wireframe may also help by hiding the faces to show the connections between vertexes.
To deselect, Right-Click and drag the rectangle selection box, then release around desired vertexes. To re-select, Left-Click and drag then release.
Toggle Mesh
Clothing option only; Right-Click to hide submesh parts from outfits and single clothing pieces, Left-Click to reveal them again.
This can have many uses depending on how the model was created, for examples to make a shirt out of a full-length dress, shorten skirts or sleeves. However, toggling off submeshes doesn't deselect them from tool effect. This may be less concern if you don't intend them to be visible in the final result, but their vertexes can still interfere with brushes used on the parts you intend to use.
Expression (Face Only)
The Expression button lists the available facial animations. It may be a good idea to regularly select some to see how facial editing appears in different expressions. Certain eye layers are only visible in specific expressions (egs, Amazed, Enraged, Spent) and eye editing can damage these in ways not visible until viewing the expression. Deformed Eyes, Cheek glow and Tears can be left out of position if facial proportions are drastically shifted. Also changes to mouth and Inner Mouth can have unexpected appearance in open-mouthed expressions (Enraged, Climax, Fellatio expressions, etc.)
The Adjust slider changes how far eyes narrow or close in certain expressions. This should be centered in default head models, but resized or repositioned eyes may need tweaking. A look at the Sleeping expression may show lids overlapping or not quite closed, and eyes may be narrowed too much or not enough for taste in other expressions.
Tools
Almost all tools are circular brushes with strongest effect at the center and weakest at the outer edge (the exceptions are Rotate and Rectangle Grab.) A smaller circle narrows the radius of effect and concentrates the tool's power, a larger circle has a more distributed effect over a larger area. The center of the circle is often needed to adjust fine details, and just the edge of the circle can be used for sculpting broader curves.
Grab/Pull
This grabs mesh at the center of the circle and pulls to wherever the brush is dragged, trailing surrounding vertexes more gradually to the edges of the circle. Only vertexes in the effect radius on Left-Click will be effected, no matter where the brush is dragged. This tool is better used for moving smaller details in shorter distances.
Smooth/Expand
Separate but similar tools, Smooth draws vertexes closer together, Expand spreads them apart. Both can adjust Clothing fit; Smooth generally tightens garments and Expand loosens them.
Both of them can even out wrinkles or smooth irregularities between neighboring submeshes, and either or both of them can help untangle wireframe when connected vertexes have been shifted out of their adjacent order.
One risk of Smooth is it can compact vertexes so closely together they lose shape and/or visibility until Restored. This can also be used to remove or hide parts of a mesh.
Restore
This restores the affected area to the shape of the original head model, gradually and selectively rather than completely and instantly as the Menu option does. Often this can be enough to repair damage from excessive morphing and still retain some of the intended edit, by blending it locally with the original shape.
Vertex
This moves single vertexes, whether they're currently displayed or not. If Mirroring is on, only vertexes that are mirrored in the model can be manipulated, and their matching vertex will also be edited.
Circle Marquee
This works much like Grab/Pull, but the circle is stationary while dragging, so the effect will remain constant where it's positioned, and it won't trail vertexes outside the circle. Where Grab/Pull is better suited to moving and adjusting fine details, Circle Marquee works better on larger body features.
Left-Click to center a circle, Drag to resize it, and Left-Click again to set it. It can be repositioned anywhere with Right-Click. Circle Marquee scales with perspective to fit the same area it was created with. It can't be resized without resetting with the 'Reset' button, or clicking 'Circle Marquee' again.
Rotate
Unlike other circle brushes, little to no Rotation occurs at the center while the most drastic Rotation occurs at the outer edge.
Rectangle Grab
This functions as many tools combined, to rescale, reposition or rotate. It works with constant effect; everything inside it moves equally or resizes proportionately.
Left-Click and Drag to position and size a Rectangle, release to create it. The 'Reset' button clears it to create another, or clicking on 'Rectangle Grab' again. While it's active, Left-Clicking will edit the Rectangle's contents, Right-Clicking will modify the Rectangle without editing. Click inside the Rectangle to move it, outside the edges to rescale it, and outside the corners to rotate it. The dot inside the Rectangle sets the center of rotation, and can by moved by directly Left-Dragging it.
Paint
Animation Menus
Animation
H-Animation
The H-Animation editor has many timelines that are variously blended in H-mode, so many different pistoning and grinding actions can be included in one position. If the basic H-Style has Hug Enabled, hugging and kissing variants can be composed, otherwise edits on those timelines will overwrite the matching timelines.
Base timelines play at a constant rate while active, and blend with any active Piston but not each other. The first three are general idle looping animations, to be played as a pre-insert animation if no Piston is applicable, and add subtle breathing motion while blending with Pistons. The zero frame of each is the Base frame, and any edits to this will also modify the matching Piston animation.
The last 'Peak' animations are played once at female orgasm. These can be changed to any length regardless of the duration of orgasm and will play once entirely before returning to the idle loop. Though three Peak timelines are displayed, Hug and Kiss Peaks will overwrite each other, and the one animation will play in both modes.
Piston timelines modify the base animation depending on action, in auto speeds or manual control. These play at a variable rate and can even stop, with the exception of the last three, the male orgasms and 'womb reach'. The keyframes are recorded as 'displacements' from the base positions, and all will update in the timeline if the Base frame is changed. The zero frame of each of these is based on the Base frame and splined with the next keyframe in the timeline [Note: it's possible to edit the zero frame, but it will be overwritten on changing animation type or saving/loading.]
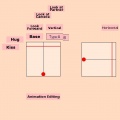
The directional Pistons -- center, up, down, left, right -- play according to internal action, whether manual or automatic at random. [The H-Test controls show only the 'Field View' -- the piston fields with center line, and the red line for 'womb reach'. In game, the Internal View can be toggled to Field View by pressing '4'.] The center Piston plays when action is close to the center line, and blends with up and down if view is Horizontal, or left and right if view is Vertical.
A-type Pistons will play at low autospeed, B-type plays at high autospeed, and in manual control they'll combine semi-randomly according to rate of action.
Shallow and Deep grinding actions play only when Right-Clicking the internal control, at a rate determined by speed of mouse dragging. Shallow grinding plays anywhere before the red line, Deep grinding plays after the red line. Both will blend with Piston depth, though they creep closer to the composed timeline as they play.
The Male orgasm timelines will play, like the Base Peak animations, only once at constant rate. Though they can blend together if simultaneous, they do not have to be synched.
'Womb Reach' also plays once at constant rate. In Internal View it plays if reaching the uterus during intercourse, or the back of the mouth during fellatio. In Field View, this will run every time the red line is crossed.
Dance
Configuration
Misc
Morphing Tips
Animation Tips
- Repositioning body parts after movement/rotation is tricky. If it's a part that's driving the motion (ie pushing off foot or knee, pulling forward with hand, etc) it's better to err in the direction opposite the movement -- it looks more natural and slightly emphasizes the motion. If it's a part affected by the motion (ie moving onto a foot, knees catching the impact of a rear collision, etc) it's better to err in the direction of motion.
- Making grind animations is easy if you already have the directional pistons. For shallow grind, take the keyframes from the first half of right-up-left-down pistons and string them together in sequence, and for deep grind take the last half of the same. You may have to drop keyframes to compress them into a smoother animation. [You could also start from left or put them in clockwise order, I'm not sure which is best.]
Controls and Hotkeys
Camera controls:
- Ctrl + Left-Click - Rotate the camera
- Ctrl + Right-Click - Pan camera up and down and dolly in and out
- Ctrl + Mouse-Wheel - Zoom
- Ctrl + Mouse-Button - Pan the camera
Keyboard shortcuts:
- Home - Returns to previous screen or closes drop-down menus
- Delete - Toggles UI
- End - Hides background
- P or PrintScreen - Takes a screenshot in BMP format found in the capture folder
Misc: Text Input:
- Shift + Enter - newline character
Editing
All:
- Ctrl + Z - Undo
- Ctrl + Y - Redo
Morph screen:
- Space - Resets Circle Marquee, Rectangle Grab and Rotation tools
- Shift + Left Drag - Fixes aspect ratio when resizing with Rectangle Grab
H-animation:
- 1 - Toggles hide/view for scene partner and clothes, then current character and clothes.
Viewer:
- Space - Replay characters' current animations from beginning
Animation:
- Ctrl + C - copies selected keyframe or range of keyframes, or a selected joint.
- Ctrl + V - pastes last copied selection
- Shift + Paste - paste reversed; for keyframes it swaps left and right, for joints it mirrors rotations of all child joints to the opposite side
- Tab - toggle FK guide lines
Keyframe controls
- Left/Right - move to next/previous keyframe on timeline
- Shift + Left/Right - move one frame next/right on the timeline
- Backspace - delete selected keyframe
- Shift + Select keyframe - selects range of keyframes from previously selected keyframe
- Right Drag keyframe - drag keyframe or range of keyframes along the timeline
- Mousewheel - when hovering over timeline, expands or contracts the scale
- Warning: may crash if attempting to move or paste a single frame after moving or pasting a range of frames. A workaround is to select/copy a frame from outside the previous range, then select the desired frame to move or copy/paste.
Joint Controls
- Up/Down - move joint selection along the bone heirarchy
- Left Drag + Right Click - clear selected joint's rotations
- Num 7,9 - rotate red ring
- Num 4,6 - rotate green ring
- Num 1,3 - rotate blue ring
- Ctrl + above Num - rotate slowly
- Num 0 - clear joint's rotations
- Enter - deselect joint
